


If you've ever scrolled past a photo of a shimmering, mosaic-style canvas and wondered how it was made, you've already met diamond painting. It's one of those crafts that looks far more complicated than it actually is. There's no drawing, no painting skill, and no prior experience required. You place small sparkling pieces onto a sticky, pre-printed canvas, one by one, until a full image appears.
This guide walks through what diamond painting actually is, how a kit works, and what to expect when you sit down with your first canvas. By the end you'll know enough to pick a diamond painting kit and get started the same afternoon.
What is diamond painting?
Diamond painting is a craft where you place tiny, faceted resin pieces onto an adhesive canvas to recreate an image. Each piece sits on a printed symbol that tells you which colour goes where, a bit like a colour-by-numbers chart. As you fill in the canvas, the flat-bottomed pieces catch the light and the whole thing takes on a sparkle that a printed picture never could.
People often describe it as a mix of cross-stitch and paint-by-numbers. You get the grid-and-symbol structure of cross-stitch and the "fill in the area" simplicity of paint-by-numbers, with none of the threading or brushwork. The resin pieces go by a few different names depending on who you ask: diamonds, drills, gems, or beads. They all mean the same thing.
The appeal is partly the finished result and partly the process itself. The motion is repetitive and quiet, and a lot of people find it genuinely relaxing, the kind of thing you sit down to for ten minutes and look up an hour later.
How does diamond painting work?
Every kit is built around one idea: match the symbol on the canvas to the right colour, then stick the diamond down. Here's how the pieces fit together.
The canvas comes pre-printed with your design, and the whole surface is covered in a layer of adhesive under a protective plastic film. Printed across that surface is a grid of symbols. Each symbol corresponds to one specific colour, and a legend along the edge of the canvas tells you which symbol matches which numbered colour.
To place a diamond, you load the tip of the applicator pen with a small dab of wax. The wax is just tacky enough to lift a single diamond off the tray. You touch the pen to the faceted top of a diamond, lift it, and press its flat side down onto the matching symbol. The canvas adhesive grabs it and holds it in place. That's the entire loop, repeated until the canvas is full.
Most people work in small sections, peeling back only a little of the protective film at a time so the rest of the canvas stays clean and sticky. You can work one colour at a time across the whole image, or finish one section completely before moving on. Neither is wrong. It comes down to what feels satisfying to you.
What's inside a diamond painting kit?
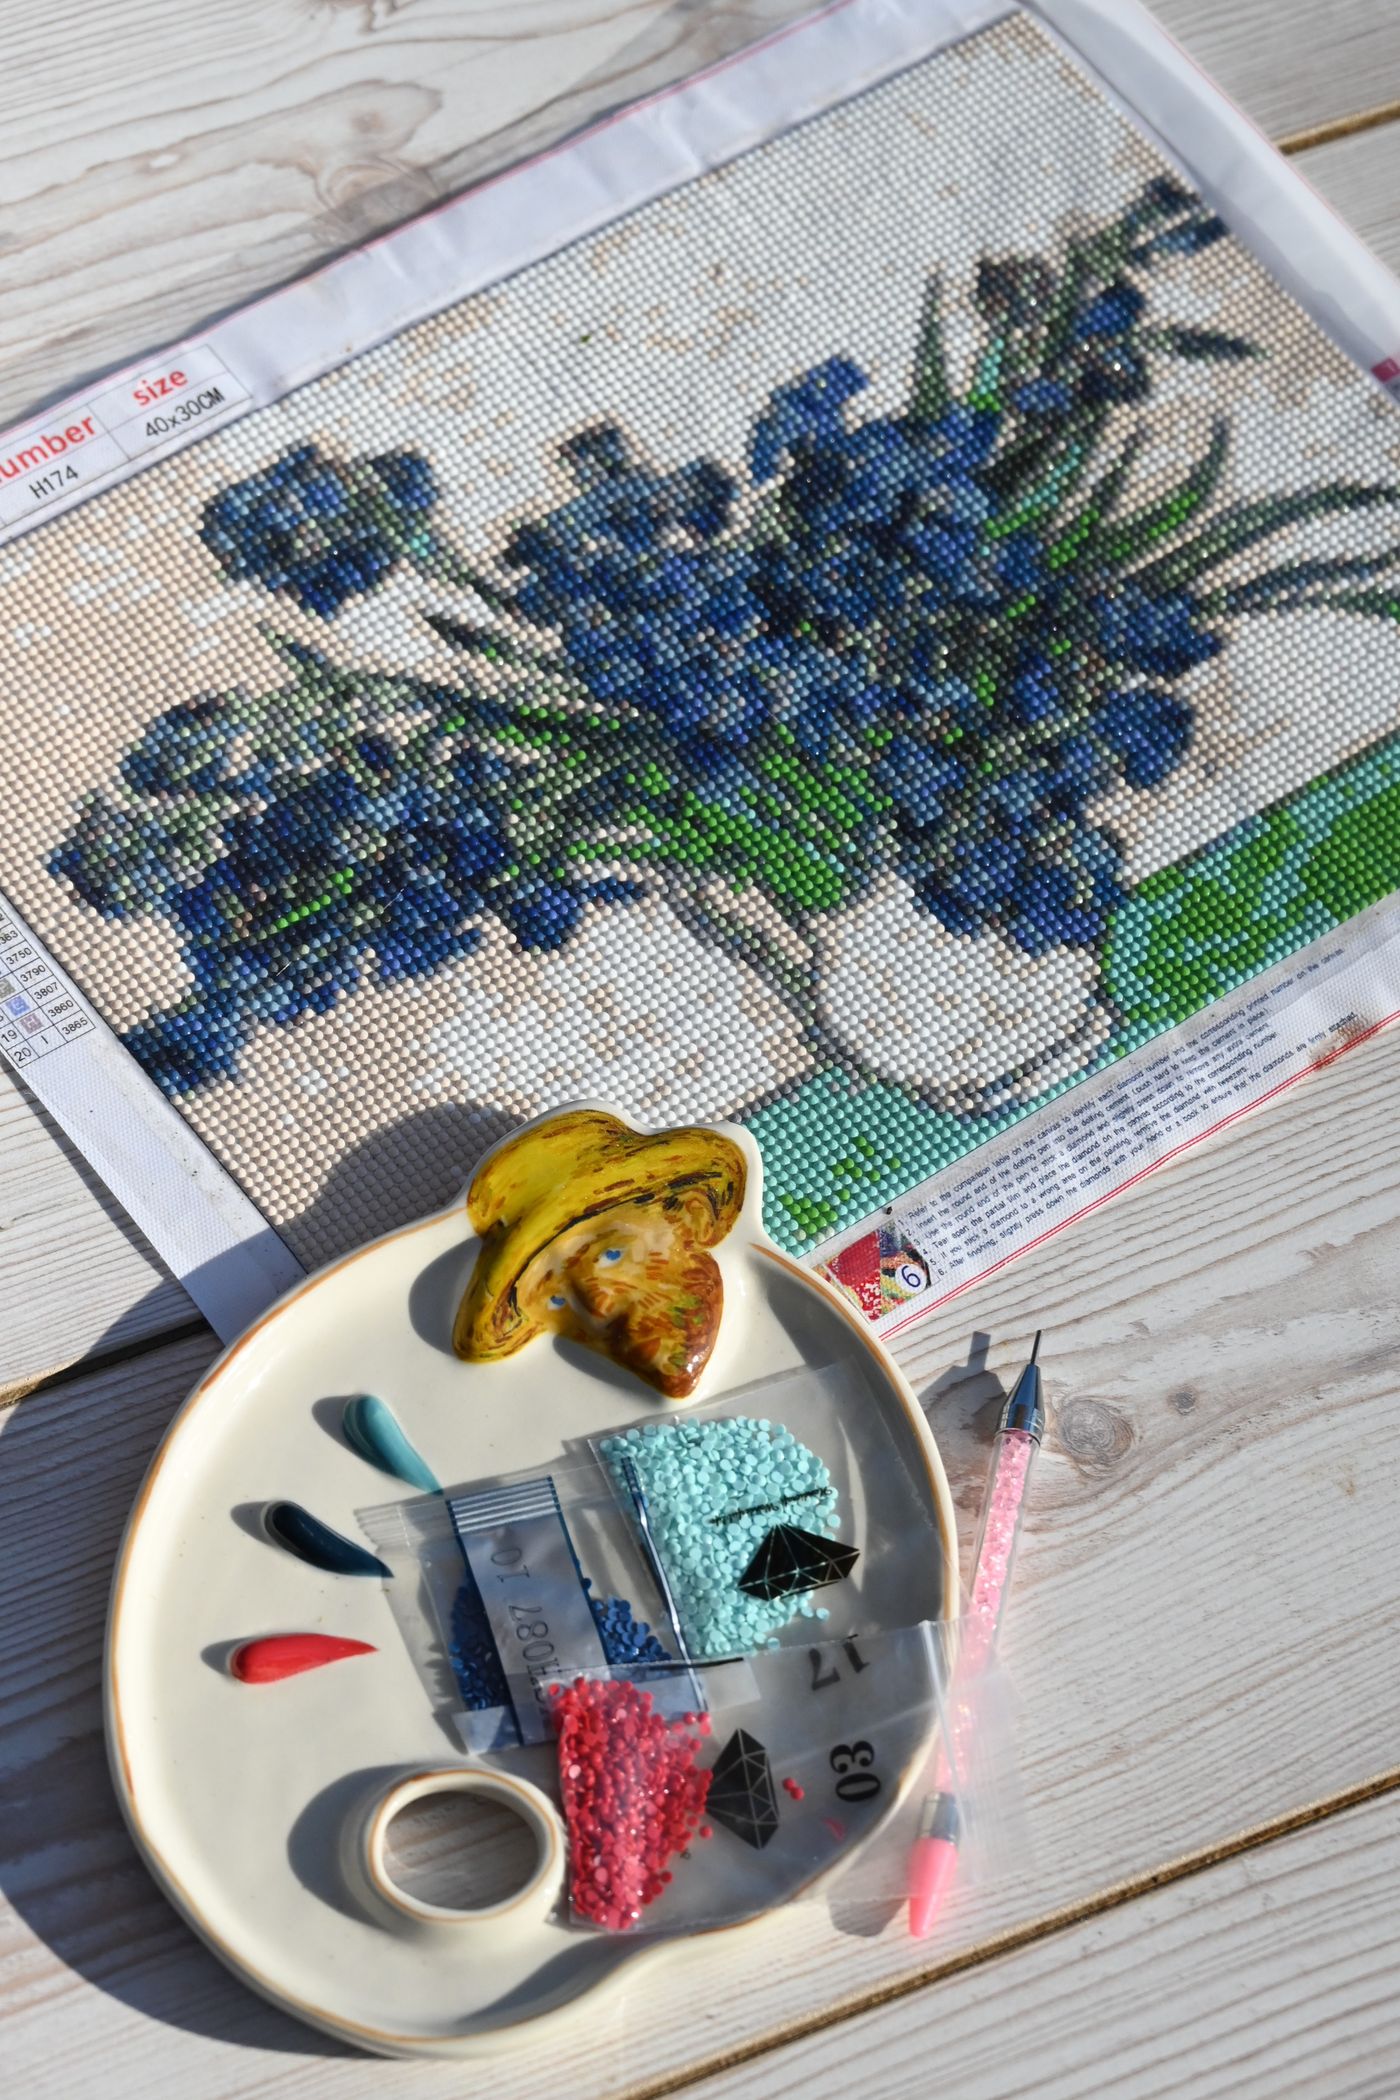
A good kit gives you everything you need to start straight away. Most include the following:
- The canvas. Pre-printed with your design, coated in adhesive, and covered with a protective film.
- The diamonds (drills). Colour-sorted resin pieces, bagged and labelled with a number that matches the canvas legend.
- An applicator pen. The tool you use to pick up and place each diamond. Many have a wide end for placing several at once.
- Wax. A small block or pot of putty that makes the pen pick up diamonds.
- A tray. A grooved dish that helps the diamonds settle face-up so they're easy to lift.
The quality of the canvas adhesive matters more than people expect. A poured-glue surface holds diamonds firmly for the life of the project, while cheaper double-sided tape can dry out and let pieces lift off before you've finished. It's worth choosing a kit that uses a proper adhesive layer.
Round drills vs square drills
Diamonds come in two shapes, and the choice is mostly down to personal taste rather than one being better than the other.
Round drills are the more forgiving option for a first project. They're quick to pick up and don't need to line up perfectly, so a slightly crooked placement won't show. The trade-off is that small gaps of canvas can peek through between them, which gives a softer, slightly textured look up close.
Square drills sit flush against each other and click neatly into place. They give a fuller, more polished finish with no canvas showing through and a more vivid block of colour. They take a touch more care to align, which some people find more meditative and others find fiddly.
If you're not sure, round drills are the easier starting point. Every design in our kit collection is available in both shapes, so once you've finished a canvas or two, you can compare and see which you prefer.
Step by step: your first canvas
The process is simple once you've done it a few times. Here's the basic order of things.
- Set up your space. Find a flat surface and good lighting. The symbols and colour codes are small, so bright, white light makes a real difference. Some people add a light pad under the canvas to read the symbols more easily.
- Lay out the canvas and read the legend. Take a moment to find the legend along the edge and see which symbols match which colours before you start.
- Sort your diamonds. Keep each colour in its bag or pour them into labelled tins or trays. Sorting first saves a lot of hunting later, especially when two shades look similar.
- Pick a colour and pour a few into the tray. A gentle shake settles them face-up so they're easy to lift.
- Peel back a small section of film. Work on one area at a time so the rest of the adhesive stays covered and clean.
- Wax the pen and start placing. Touch the pen to the wax, lift a diamond, and press it onto its matching symbol. Repeat.
- Press and seal when you're done. Once the canvas is full, press it flat under a rolling pin or heavy book so everything sits firmly. If you'd like to display it long-term, a brush-on or spray sealer adds extra hold.
A few beginner tips worth knowing
None of these are essential, but they smooth out the early learning curve.
- Work from the top down if you tend to rest your hand on the canvas, so you're not knocking loose diamonds you've already placed.
- Don't peel the whole film at once. Exposed adhesive collects dust and pet hair and slowly loses its tack.
- Reapply wax when the pen stops grabbing. A pen that suddenly won't pick anything up almost always just needs a fresh dab.
- A misplaced diamond is fixable. Lift it with tweezers or the pen tip and reposition it. Nothing is permanent until you want it to be.
- Step back often. Diamond paintings are meant to be viewed from a distance. Up close you see gaps, from across the room you see the full, finished image.
Why people love it
Beyond the finished art, the draw is the calm. The repetitive placing of each diamond gives your hands something to do and your mind somewhere quiet to settle. Plenty of people reach for it to unwind in the evening, and many find it easier to relax into sleep afterwards. It asks nothing of you creatively, which is exactly the point. You don't have to make a single decision, you just follow the chart and watch the picture come to life.
It's also a craft with a real payoff. A finished canvas is something you can frame and hang, not tuck away in a drawer. That makes it a satisfying way to spend your time, whether you're after a relaxing hobby, a screen-free evening, or a piece of sparkling art for your wall.
Ready to start your first canvas?
The best way to understand diamond painting is to try it. Pick a design you genuinely love, since you'll be looking at it for a while, and start with a size that won't feel overwhelming. If you're not sure where to begin, our best-selling kits are a reliable place to start, since they're the designs the most people have already loved.
Have a browse through our kits and find the one that catches your eye.

